Tuesday, March 5, 2013

Croissants


After making these, I believe every croissant made in the traditional French fashion should cost $10.    And that would be a bargain.

These took a full day and a half to create (a lot of it is rest time) with serious bouts of rolling and elbow grease.   Those delicate layers seen above belie the work and intensity needed to make them.

The recipe starts fairly basic with a stout, yeasted dough made in a mixer (even my borrowed professional mixer struggled with its thickness).  The butter is prepped with a little flour to absorb any water.  The dough and the butter are then shaped into ovals and rested in the refrigerator overnight.

Then comes the most interesting part.  After enveloping the butter with the dough like a purse, it is beaten (preferably with a french rolling pin without handles) until the butter spreads outward into the entirety of the dough.  It actually works.  Then after a few light rolls, it rests in the fridge for about 2 hours.


And the day continues on like this.  Roll, fold, rest.  Roll fold, rest.  Roll fold rest.  Yes, three cycles of this, or "turns" as they call it.  And the third turn is actually a double turn and the dough is le portefeuille (the wallet).  (Sounds so much better in French.)

roll & fold

roll & fold

my wallet

Finally, it can be rolled one more time, cut and then shaped into crescents.   For this part, I cut too many triangles and wound up making petite croissants.   But luckily, I still had half of my dough left, and I could recoup my mistakes and make bigger chocolate croissants.   All the better.  I did not have any "batons" of chocolate but rough chopped chocolate worked just fine.


my petite croissants


Then, unbelievably, they rise for 3-4 more hours before baking.  (Now I understand why bakers have to get up so early in the morning.)  Then it is a short 15-17 minutes in the oven.

So, we ate them at 9pm.  They were perfect dessert croissants.  And the taste of the chocolate ones fresh from the oven may entice me to make them again.  Maybe.  But I also wouldn't mind paying $10 for one, now that I know how to make one...


This recipe is made with the Tuesdays with Dorie, Baking with Julia baking group.  Visit our host's site for the full recipe.

The drink needed to tackle this recipe.


And Rhiannon:


Monday, February 18, 2013

Boca Negra


Boca Negra.  Black Mouth.  This certainly must refer to the density of chocolate in these babies; impossible not to have a black mouth while eating one.  Impossible, not to have a smile on that mouth as well.   These are incredible chocolate bombs, indeed fudge-like when eaten out of the fridge.  And the bourbon added in just makes that smile bigger.  Topped with white chocolate bourbon cream and you almost have to laugh.  These were an ideal match for my husband as he loves chocolate and he loves bourbon; a perfect fit for Valentine's Day.

So this recipe is pretty simple.  Make a bourbon simple sugar.


Use it to melt the butter and chocolate.


(That's a lot of butter and chocolate).


Add some lightly mixed eggs and sugar.  Add a touch of flour.  Pour and bake (in a water bath) until a skin forms on the top.  Do some flipping and the cake unmolds.


That last step was my only downfall.  Somehow the cake, when unmolded just fell apart.  I have a feeling I didn't bake it long enough, although I cooked it for 10 minutes longer than the recipe called for.  Or maybe I should have waited a bit for the cake to set instead of trying to flip it right out of the oven.   Anyhow, I could not let this amazing batter go to waste.  I scooped up as much as I could and plopped it into ramekins (about 7 total).  I then put these ramekins back in the water bath for 5-10 more minutes.   I have no idea if this affected how they turned out, lacking a comparison, but they were fabulous.  And my husband thought they were pretty great too.


These were topped with a white chocolate bourbon cream.  Over the top for sure.


And here is Rhiannon back on the swing.


This post is part of the Tuesdays with Dorie baking group.  See our host for the week, Cathy at Frederick Food Garden,  for the recipe.

Monday, February 4, 2013

Focaccia


This was supposed to be the perfect base for our Superbowl sandwiches!  It was still edible but clearly not the perfect, fluffy base I was envisioning.  It was all going so well, until I squished the painfully-slowly-risen loaves (yes, it took over 36 hours to raise this dough) with my palms in order to pop bubbles with a razor blade, as instructed.  I must have overdone this step, or maybe my dough did not have a lot of extra air to get rid of.   Whatever the case, my loaves were quite flat with only puffy, focaccia-like edges.   We took those end pieces and made our sandwiches.  Goat cheese and grilled veggies (see below) were excellent as suggested in Baking with Julia.


This recipe is part of the Tuesdays with Dorie cooking group.  The host this week is Sharmini of Wandering Through. See this link for the full recipe.


Rhiannon hating the snow.

Monday, January 28, 2013

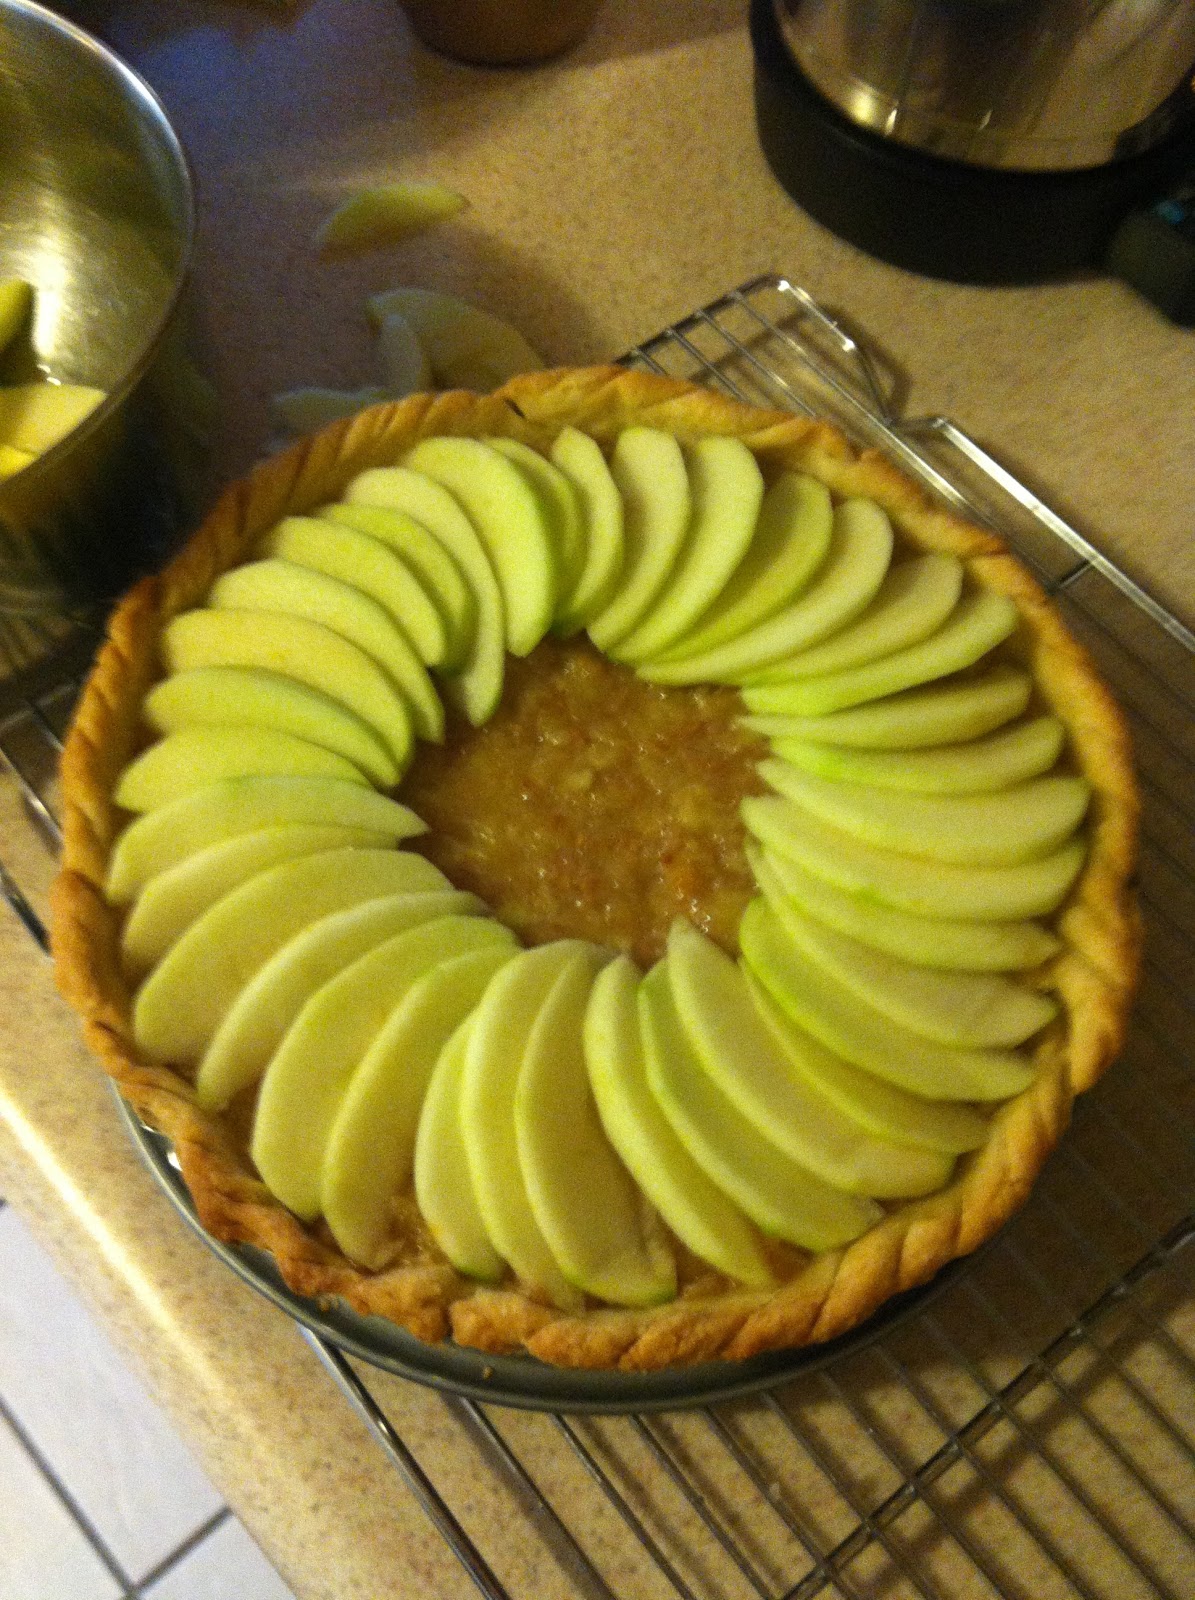
French Apple Tart


This is a gorgeous tart.  And if something can taste gorgeous as well, this tart does.  The recipe reads something similar to an open faced apple pie, starting with pastry dough as a base and blind baking it in the pan.  But then it starts to deviate, with roasting the apples and creating the filling separately.  As I learned with Blueberry- Nectarine Pie, this step is often utilized by pie makers as well, in order to properly adjust the filling for flavor and set prior to baking the pie.  Then the crust and filling are topped with thinly sliced apples brushed with butter and sprinkled with sugar.

It all sounds so simple when I write it out like that, but in reality this creation took me three days to make.  Day 1, I made the dough.  Day 2, I made the filling.  Day 3, I did the blind baking and assembling of the tart.  This three day spread actually made this tart enjoyable and exciting to make.  Had I made it in one day, I think I would have been overwhelmed by all the steps, albeit simple steps.

A few deviations of note: I used whatever apples I had in the fridge (Gala? and Fuji?) and they were old and battered.  The recipe calls for Granny Smiths which I used for the top only.  This worked out fine, probably a bit sweeter.  I also used whole wheat bread crumbs for the "fresh, fluffy breadcrumbs".  No harm there either.   And alas, I am a week late for the Tuesdays with Dorie baking group.  I'll get on target soon, maybe next week with foccacia...


Making the filling:

my random apples
apples with sugar and cinnamon
roasting the apples
WW breadcrumbs
mashing the baked apples
the filling

Prepping the crust:

making the "ledge"
trimming
the french touch
bean pie weights
blind baked


Putting it all together:

filled

1st layer
2nd layer and rosette


And Rhiannon...


Monday, January 14, 2013

Finnish Pulla


This recipe was scheduled to be done in mid-December with the Tuesdays with Dorie, Baking with Julia cook group but leave it to the holidays to allay best intentions.  I actually DID make this over the holidays, just not in time to post with the whole group.  So here, I post, in a make-up week.  

This makes a beautifully, stunning bread.  Well worthy of any holiday breakfast table.  And with some easy timing adjustments (final rising in the fridge over night), it can actually be ready in the morning.  And it was a simple recipe, especially considering how grand it looks in the end.  I just love recipes like that: ones that belie the effort taken to make it.  

I found myself baking this recipe at my in-laws in California not unlike the blueberry nectarine pie from this past summer.  We hunted down some yeast with an upcoming expiration date, but rather than run out to the store again at holiday time, we gave it a go.  Well, the yeast worked, but it was a bit sluggish.   The proofing should have been my first sign, but in my defense, it did proof, just not much.  And the first rise was well below double in bulk, and I gave it almost double time to rise.  (I know, I know, how many signs do I need?)  The second rise in the fridge overnight barely showed signs of growth.  But, believe it or not, 15 minutes into it's baking time it grew tremendously, giving it, it's final appearance above.  

What the picture does not show, is the doughy texture found inside, resulting from those initial sluggish rises.  It also cannot depict the smell and taste of the fresh cardamon.  I think it was that flavor alone that  made people forget the doughiness and just keep eating.  It was gone by lunch.  

And I owe thanks to my husband for hand crushing that cardamon with mortar and pestle.  It made all the difference.


Making the dough...


Shaping the dough...


Rhiannon at the slopes